Using Napari
Note
Napari must first be installed to use the PSSR2 plugin. Detailed instructions can be found in the Napari Documentation
Train Model
The PSSR2 Napari plugin is automatically installed with the rest of the package.
To access the plugin, open Napari and navigate to Plugins > PSSR2 > Train Model.
The training GUI will be visible on the right side of the active Napari window.
The PSSR2 Napari plugin is similar to the PSSR2 CLI, in that it exposes package features and object parameters in an easily accessible format, and shares much of the same functionality. All features included in the CLI are also included in the Napari plugin.
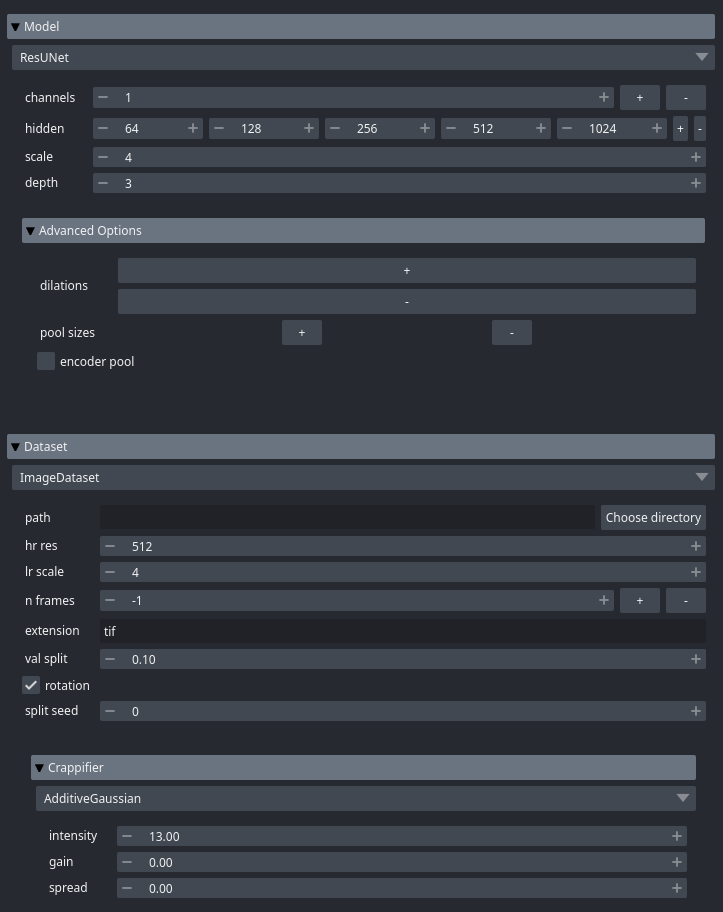
Datasets and models are defined under their respective dropdown menus. Here, the type of each object can be selected along with the parameters of the object. The API Reference can be consulted for full documentation on all parameters.
Different parameters types are edited in different ways. For example, the number of elements in a list can be increased or decreased with the rightmost buttons, while the values in the list can be increased or decreased with their respective buttons:

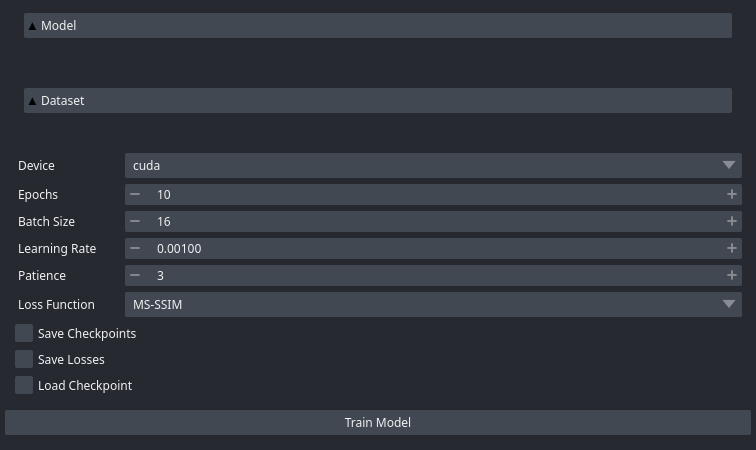
Options for training can also be defined, such as the training device, batch size, and loss function.
By selecting Save Checkpoints or Save Losses,
model checkpoints or training losses will be saved at the end of every epoch.
By selecting Load Checkpoint, training can be resumed from a model checkpoint.
By default, everything is saved in the folder that Napari was launched from:

After properly defining all objects and options, the model can then be trained by selecting Train Model:

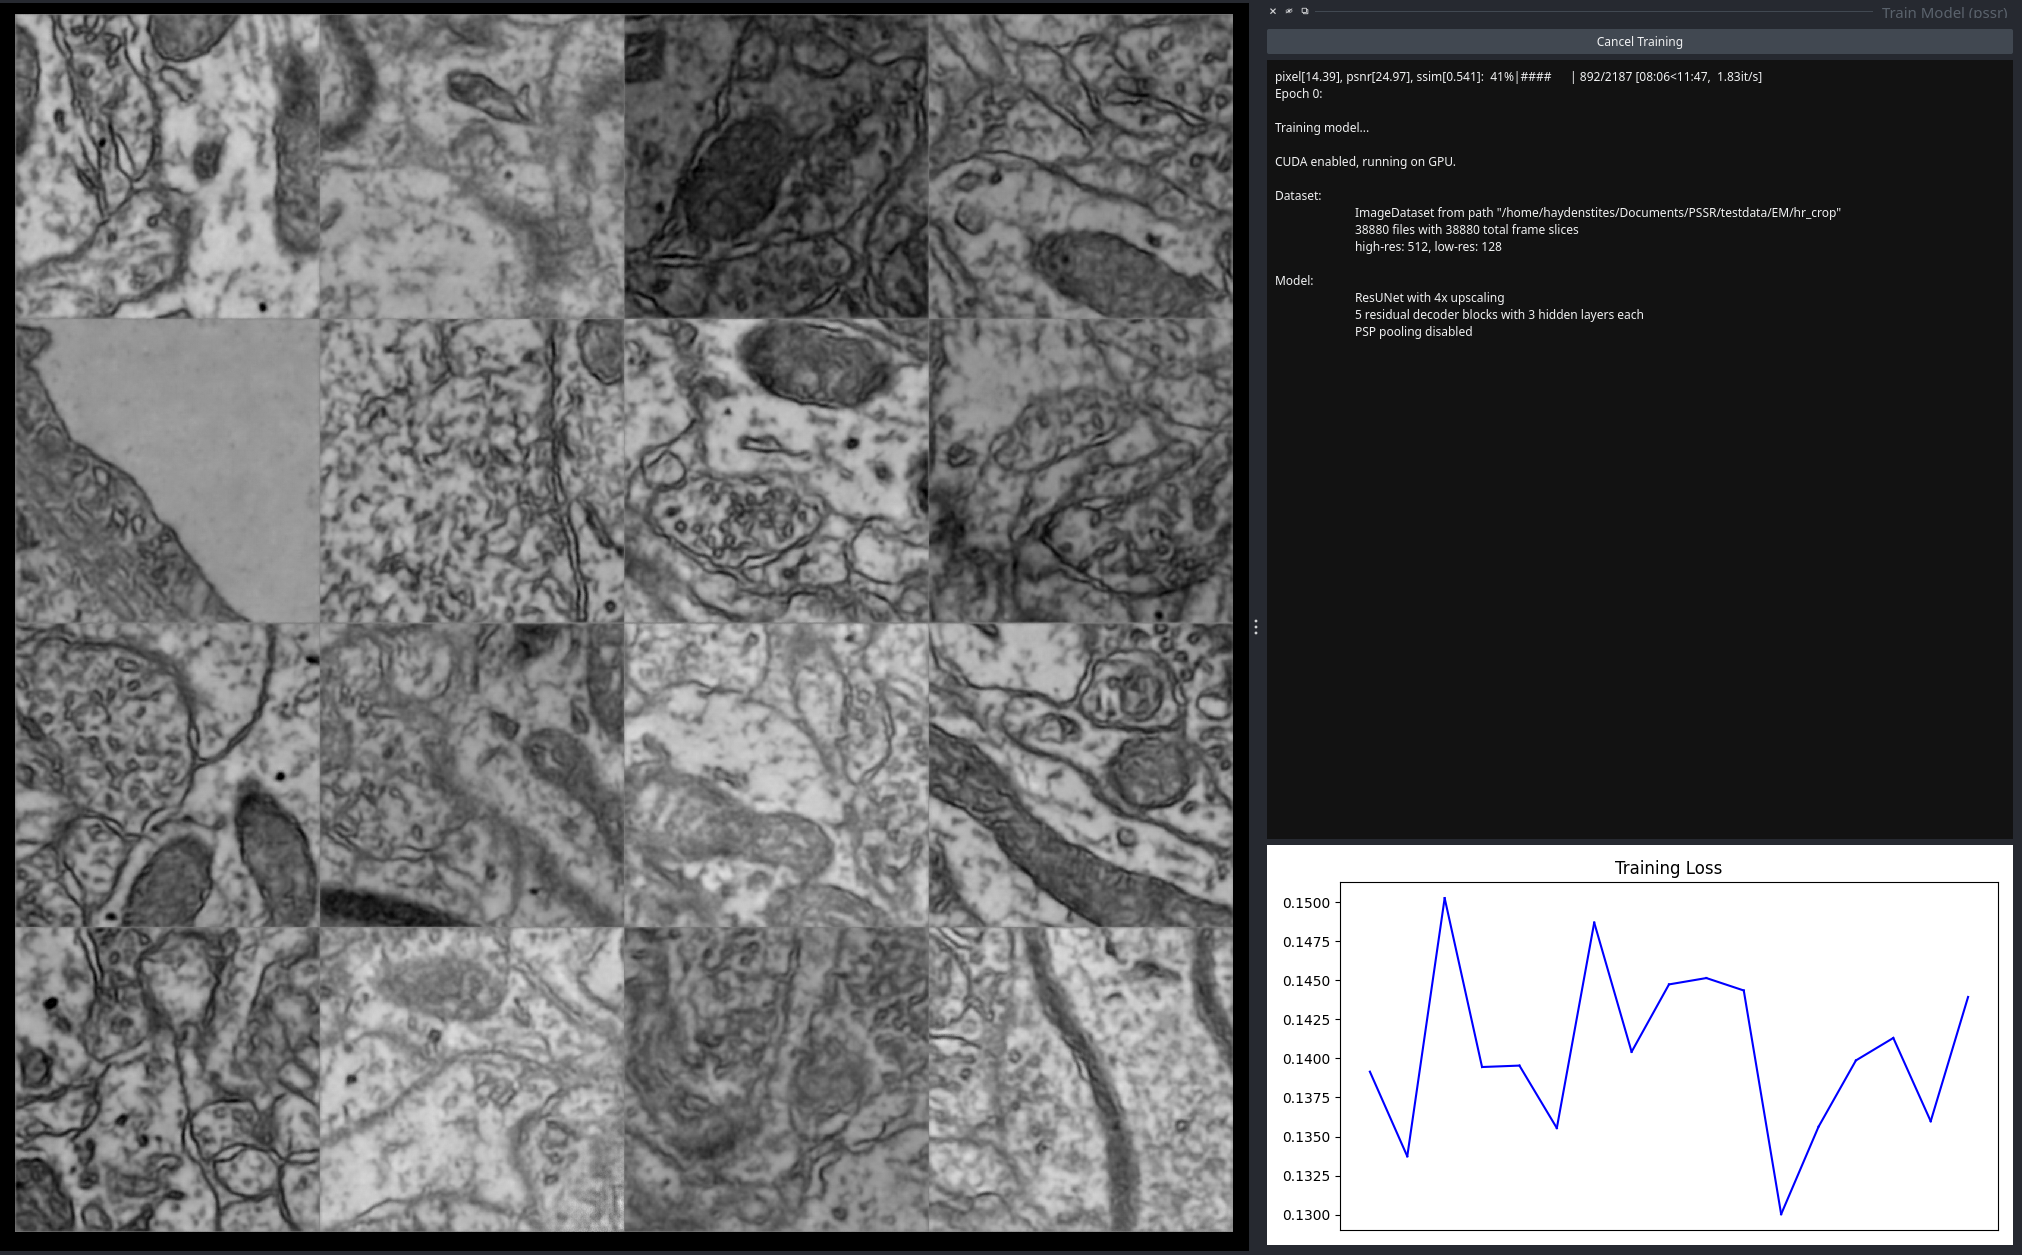
The training objects/parameters will be replaced by a read-only console, similar to that in the CLI, showing the status of model training over time.
The performance of the model can be monitored via the Napari viewer. There are three viewer layers:
HR (ground truth high-resolution images)
PSSR (PSSR super-resolution model predictions)
LR (crappified low-resolution images)
Each viewer layer contains all of the images of their respective quality, updated every 50 iterations. There is also a plot of training losses where new points are plotted at the same frequency.
When model training has completed, the trained model will be saved.
Predict Images
To super-resolve images using a trained model from the previous step,
open Napari and navigate to Plugins > PSSR2 > Predict Images.
The predict GUI will be visible on the right side of the active Napari window.
The dataset and model objects will be visible again. The dataset should now be defined with the low-resolution images to be super-resolved. The model must have the same settings as the trained model to be properly loaded.
After entering the path to the trained model, the given low-resolution images can be super-resolved by selecting Predict Images.
The predicted images will then be saved to the preds folder relative to where Napari was launched from.